
Easy Air Conditioning Control
The TLDR version (8 minute read)
I get annoyed by the fact I have to get out of bed to turn on the air conditioning and solve the problem by connecting the AC to my home automation system.
It’s in the middle of summer. At 5pm, you go home and the first thing you do is to turn on the air conditioner to cool the house down after a hot day. It turns out that everyone else does that too. The electricity network operator watches as electricity consumption peaks for the day, as expected. The less expected bit is that as the clock nears 6pm, one of the biggest single generators in Collie, a coal power plant, trips and stops delivering power in to the grid. Suddenly, 10% of the power supply on the network evaporates but the air conditioners are all still on and hungry for electrons. There is no battery storage or buffer on the network beyond the collective mass of spinning turbines at the other powerplants. Supply must equal demand. System frequency drops as that spinning mass slows towards a critical system threshold. Within seconds, emergency signals go out to gas power plants to quickly spin up and plug the gap before rolling blackouts topple the network. This event and the backup capacity required to survive it costs grid participants hundreds of thousands of dollars over minutes.

What if we could remotely turn off thousands of un-needed appliances or tap in to home batteries at this crucial moment? To cover the gap left by the trip of one of Synergy’s biggest coal fired steam turbines, Muja 8, you’d need around 40,000 batteries to switch to ‘full power export mode’. As an alternative, you could reduce demand for electricity on the network and switch off around 200,000 pool pumps. This notion of switching devices off remotely to save the grid is called ‘Demand Response’ and has historically only been available to commercial businesses with huge electrical loads that they can turn off for a while given the right financial incentive.
This situation is changing. When we group lots of houses with controllable devices together, we call them a Virtual Power Plant (VPP). These VPPs are being trailed as an alternative to building more centralised power plants and as a result, electricity market rules are being revised to enable their financial participation in the market to create an economic case for investment.
“AGL’s conclusion from this trial is that the remote control of existing (already installed) air conditioners
during demand response events is not currently viable using the technology specified in AS4755.”
Air conditioners are one of the more power consuming as well as one of the most awkward home appliances to connect to the internet for control. This ARENA knowledge sharing report regarding a ‘demand response’ program trial conducted by AGL, a retail power company in New South Wales, describes how ineffectively air conditioning units responded to grid operator commands to turn down the power to support the electrical grid to reduce the risk of blackouts.
Naturally, I thought it would be a great idea to do a better job at it than the authors of AS4755, an Australian Standard for Demand Response Enabling Devices (DRED) used to control these AC units.
This experiment cost me approximately $80 at the end of the day, almost half of the consumer market solution called Sensibo.
Getting thrifty with infrared
The mission: Control my air conditioner from the internet as a proof of concept alternative to using the AS4755 standards. Do it more cheaply than buying a retail solution.
The AC selection criteria: You have a split-system reverse cycle air conditioner with an infrared remote control (not radio) which is most air conditioner systems that are not ducted systems.
Step 1 - Find cheap hardware to accelerate development
A little Googling on the topic of ‘remote control of air conditioning’ made it clear that the DIY home automation community figured this one out a long time ago. It turns out that there are plenty of ‘universal IR blaster controllers’ that connect to home Wifi networks and a related home automation system. I thought I’d go shopping for some:
The models I bought:
Off-the shelf solution - Broadlink BestCon RM4C Mini Universal Wifi IR Remote Controller (~$22 inc. tax via AliExpress)
Favourite for reprogramming - Generic Tuya WiFi IR Remote (~$16 inc. tax via AliExpress)
Used to be cheaper but less good in practice - Generic Tuya-based WiFi IR Remote (~$17 inc. tax via AliExpress)
Yet to be received - Moes, Tuya-based WiFi IR Remote (~$15 inc. tax via AliExpress)


Iteration 1 - Remote control yes, integration no

The very capable Broadlink dashboard with offline devices after I threw out the RM4C
The Broadlink BestCon RM4C Mini had a popular predecessor called the RM3 Mini which a number of people used to connect TVs and Air conditioners to the Home Assistant home automation platform. Based on the Home Assistant integration documentation for Broadlink devices, I thought I would be able to connect my RM4C mini but I got stumped when I tried to get the device connected to Home Assistant. The two example linked blogs above give quite a complex set of steps to connect but at least it wouldn’t be necessary to crack open the device and fiddle with programming.
I was able to download the Broadlink Smartphone App, control the air conditioner through the mobile network when out of the house and also control it via my Google Home voice assistant. From this test, it was a good solution for general control of my air conditioner but simply put, I don’t want another app to control things, I want integration to my main control dashboard. This device failed my test so it was time to try some more devices. I took the scatter-shot approach next and ordered 3 more generic models because 6 weeks was a long time to wait for delivery from China for the first iteration.

Thwarted by a setup screen
At the end of the day, Home Assistant couldn’t detect the Broadlink RM4C on my home network and I couldn’t figure out what host address to use. Back to the drawing board with a new learning - avoid proprietary applications and communications protocols.
Iteration 2 - Cheap and generic - Excellent!
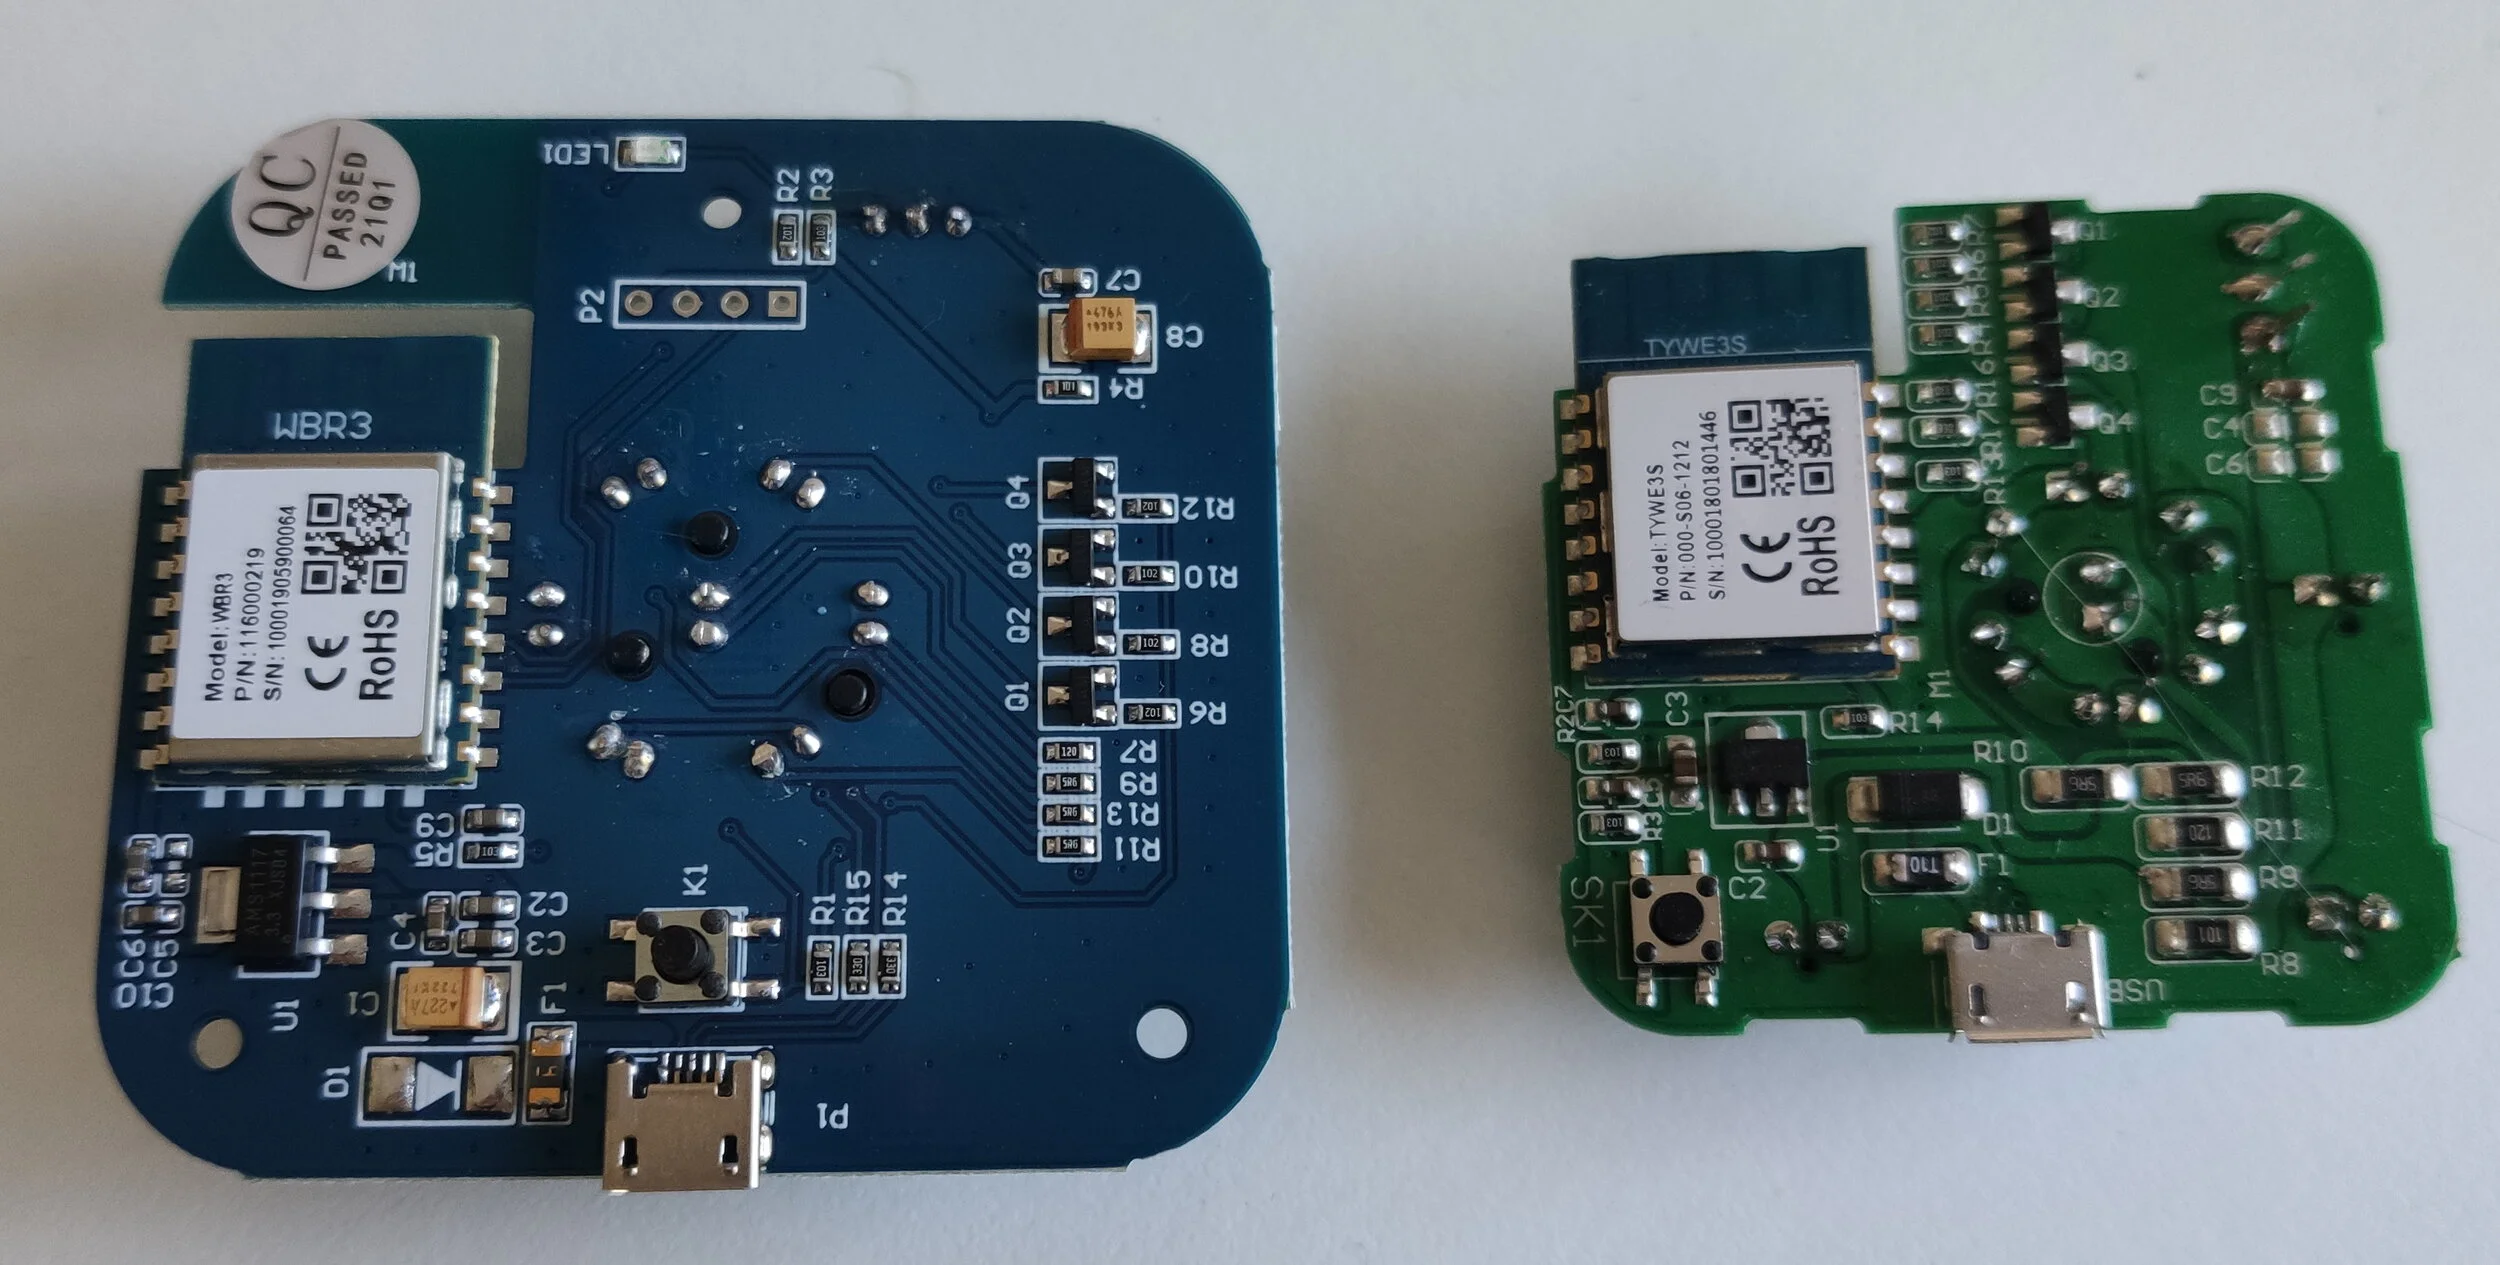


I did some more Googling and bumped in to this great blog by Savjee (who makes other helpful ‘simply explained’ videos on YouTube) who set me up for success. The secret weapon? Replacing the ‘Tuya’ firmware (the code that sits in the brain of the IR Blaster device) on a generic device with ‘ESPHome’ firmware which can be done relatively easily and sometimes without wires and soldering. In this case, ‘Tuya’ brand devices or devices that connect to the Tuya or Smart Life mobile app, are devices that are typically based on an ESP8266 microchip which is what controls the device and connects it to your WiFi network.
By using the ESP8266 chip, any of these devices can now be reprogrammed using the easy to use ‘ESPHome’ plugin for Home Assistant. Now after more reading of how to replace or ‘flash’ the firmware on this ESP8266 chip in these generic IR blaster devices over WiFi, I decided that it would be easier to just get out the soldering iron and skip a handful of steps.
Here are the simplified steps below:
Step 1 - Order an IR blaster and other equipment
AliExpress is your one stop shop for generic, ESP8266-based internet of things products including those put out with Tuya firmware. The device I used in the end was this $16 one and it’s great because it’s small, good looking and easy to reprogram. Order one ASAP!
What else will you need to complete this reprogramming process? Get a USB to Serial FTDI converter that can operate at 3.3V ($4). If you need a soldering iron kit ($65), a breadboard ($5) and some jumper leads ($3), go get them too.
EDIT/ALERT (2/1/2023): Many comments have flagged that manufacturers of these devices have been swapping out the ESP8266 with alternative chips that are harder to hack. Personally, I’ve turned to designing my own boards to merge other features but I can recommend the WEMOS LOLIN boards in the meantime. Here’s a link to their IR control ‘hat’ to the D1 mini ESP8266 board. Easy to program over USB with good documentation.


Follow these steps to get started with the ESPHome Add-on
Step 2 - Setup Home Assistant
This is my home automation platform of choice. If you already run Home Assistant, skip this step. This getting started guide is a good place to start. I use a Raspberry Pi (small reliable computer) to run this home automation server but the team at Home Assistant also have a ready to switch on version of the server available to buy from selected distributers.
Once you complete onboarding and are logged in to the Home Assistant dashboard, you’re ready to install the ESPHome addon.
While you’re at it, also add the ‘File editor’ Add-on which can be used to create a ‘secrets’ file (in file path esphome/secrets.yaml). This is where you’ll store your home WiFi password and SSID later.
Step 3 - Generate the firmware

Click on this image to find an example for the full configuration file for your air conditioner.
Go to the ESPHome tab and hit the green plus button to create your first ESPHome node. Give it a name, a device type (generic ESP8266), enter your WiFi Password and SSID and hit done and you’ll see that you’ve created a little placeholder for your device. If you press ‘EDIT’, you’ll see the configuration file that ESPHome made for you. In this case, we’re going to replace that code with what I have linked here.
When you tweak your configuration, you’re going to need these details:
Your local WiFI login details: SSID and password
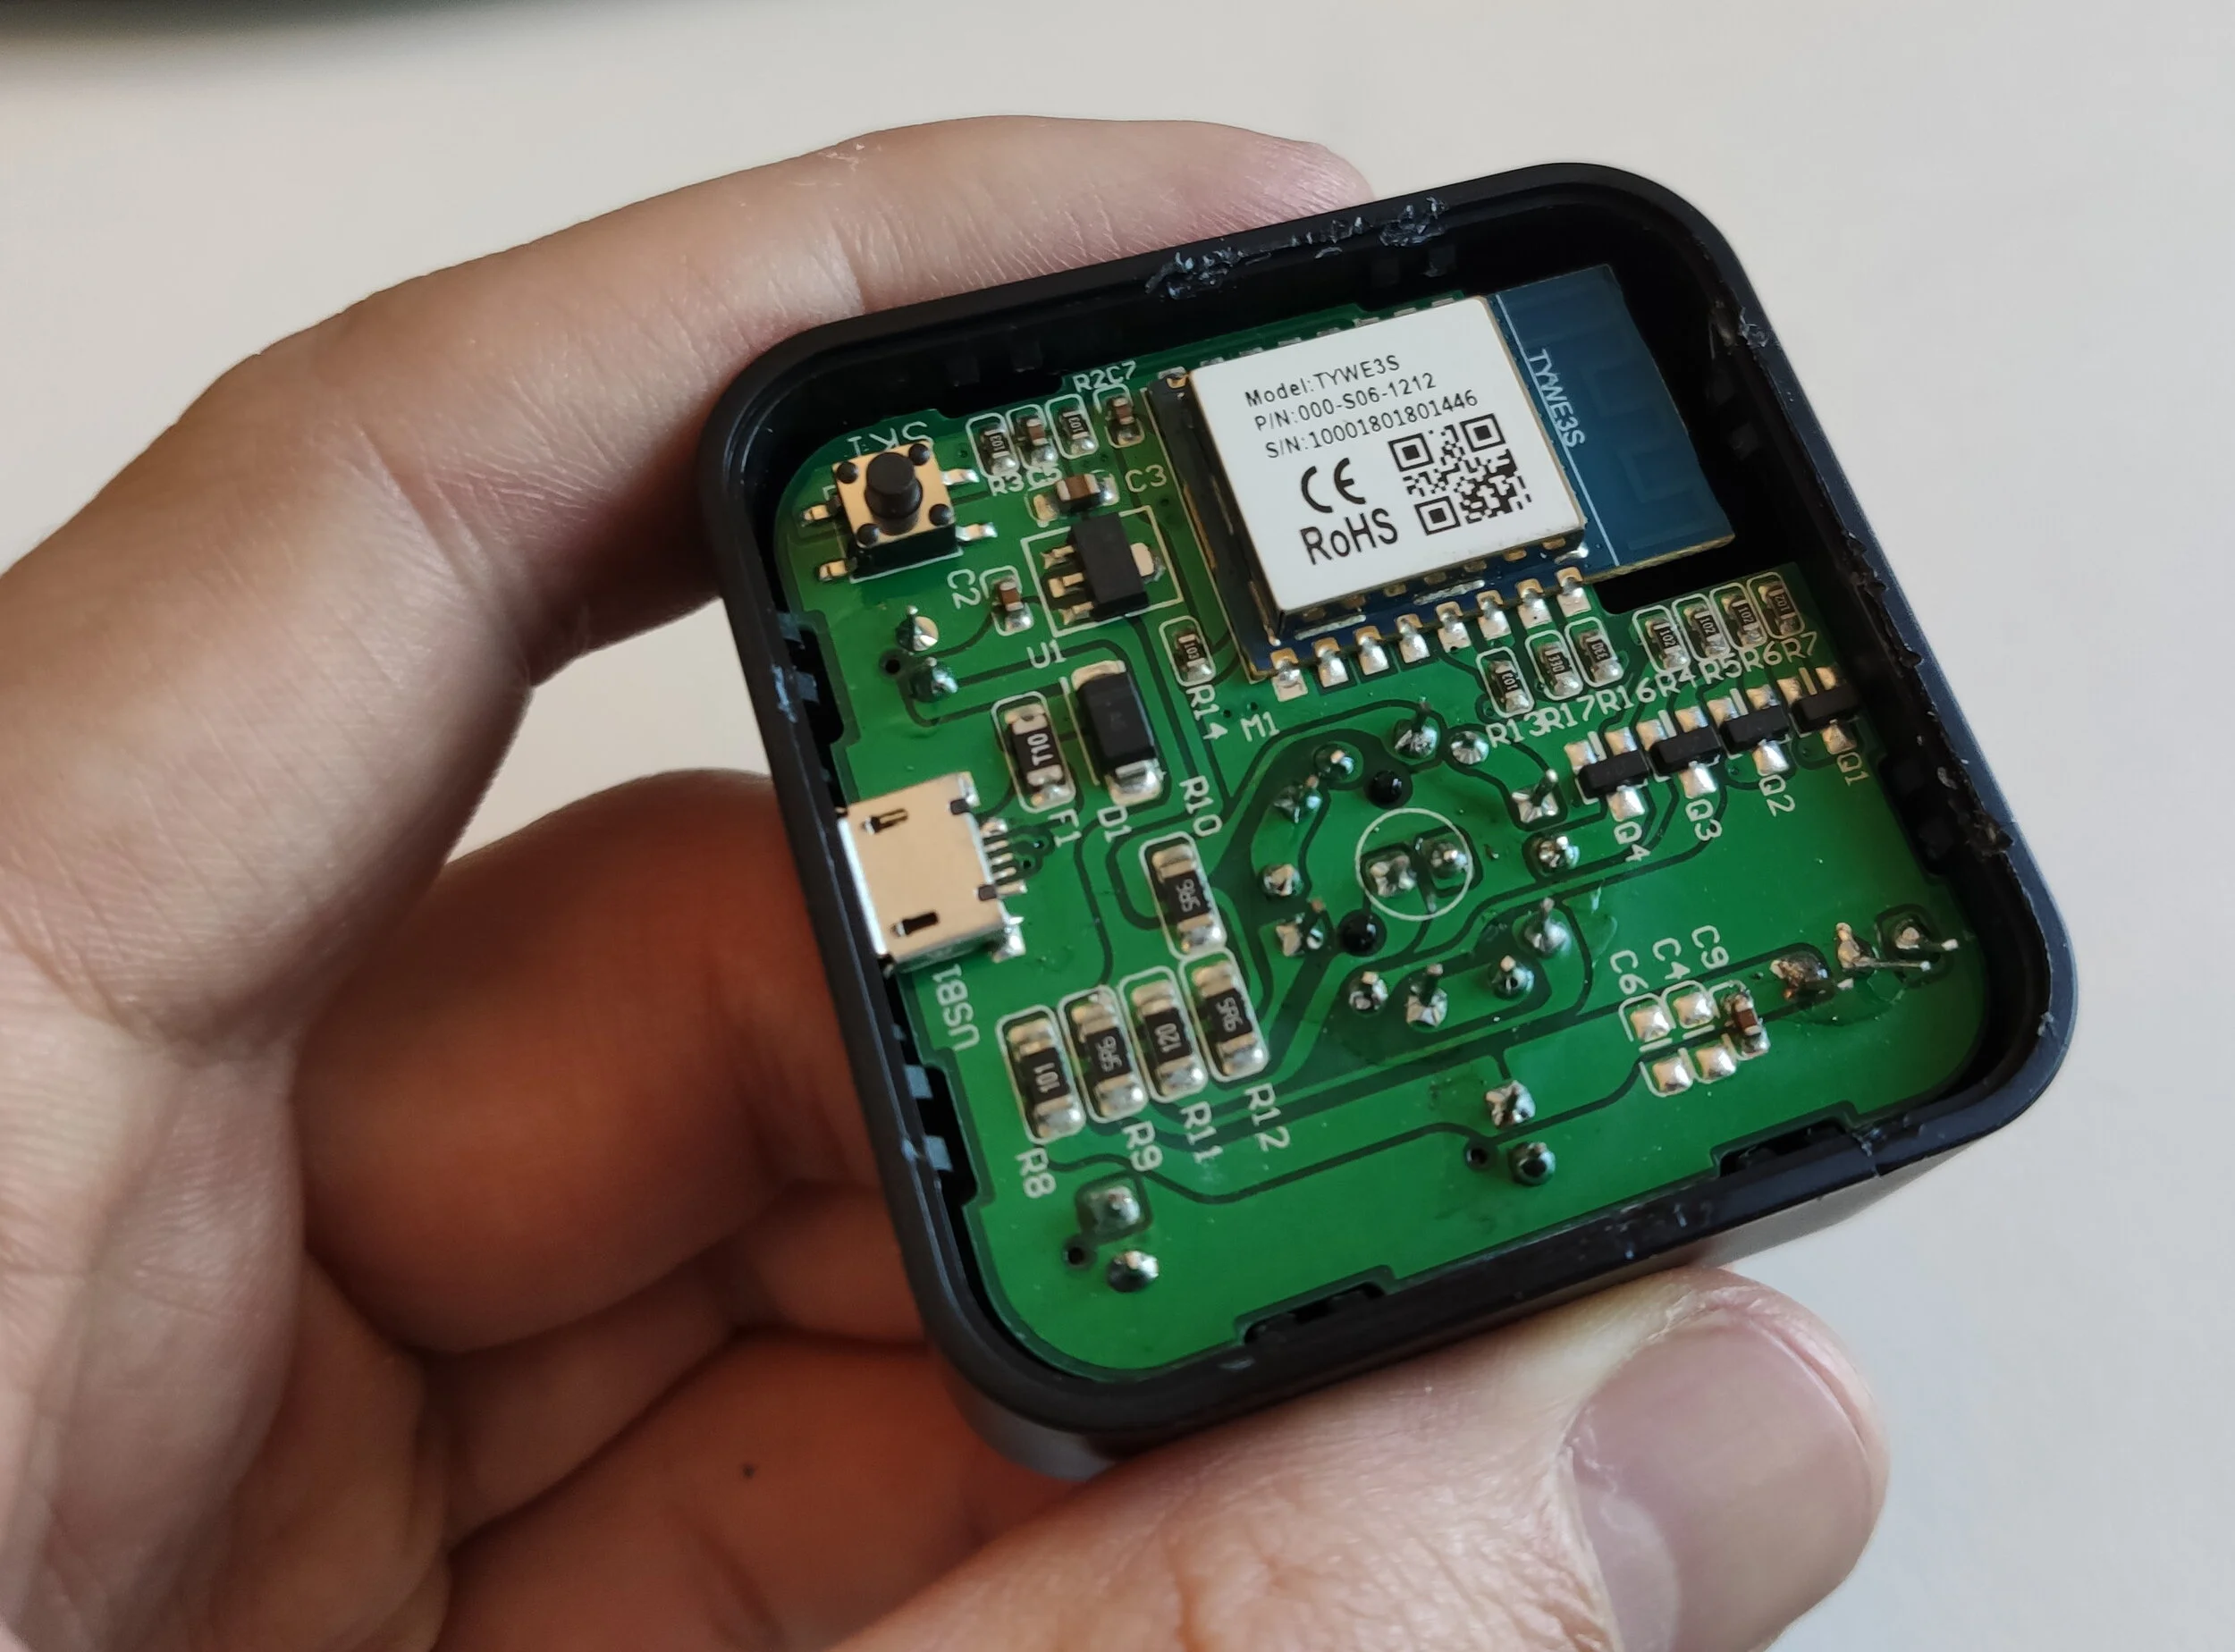
ESP8266 control pin numbers - these are the pins for this particular IR blaster which I determined by looking closely at the circuit board:
GPIO4 - Blinks the blue status light
GPIO5 - Connects to the infrared signal receiver which enables this device to tell home assistant when the regular handheld remote has been used to turn the air conditioner on and off.
GPIO14 - Connects to the infrared LED lights that will send signals to your air conditioner.
Your air conditioner brand - ESPHome supports over 10 brands of air conditioner. You should check support before you get in to deep. Here is the list of supported brands and whether the IR blaster will be able to read commands when you use the regular remote to turn on your AC as well.
The Home assistant entity_id of a nearby thermometer in the room if you have one - this can be used to show the current room temperature in the Home Assistant dashboard later. See Sanjee’s tutorial for more on that.
Once you’ve saved your configuration file, you’re ready to compile the code and download your new firmware!

Step 4 - Connect to USB
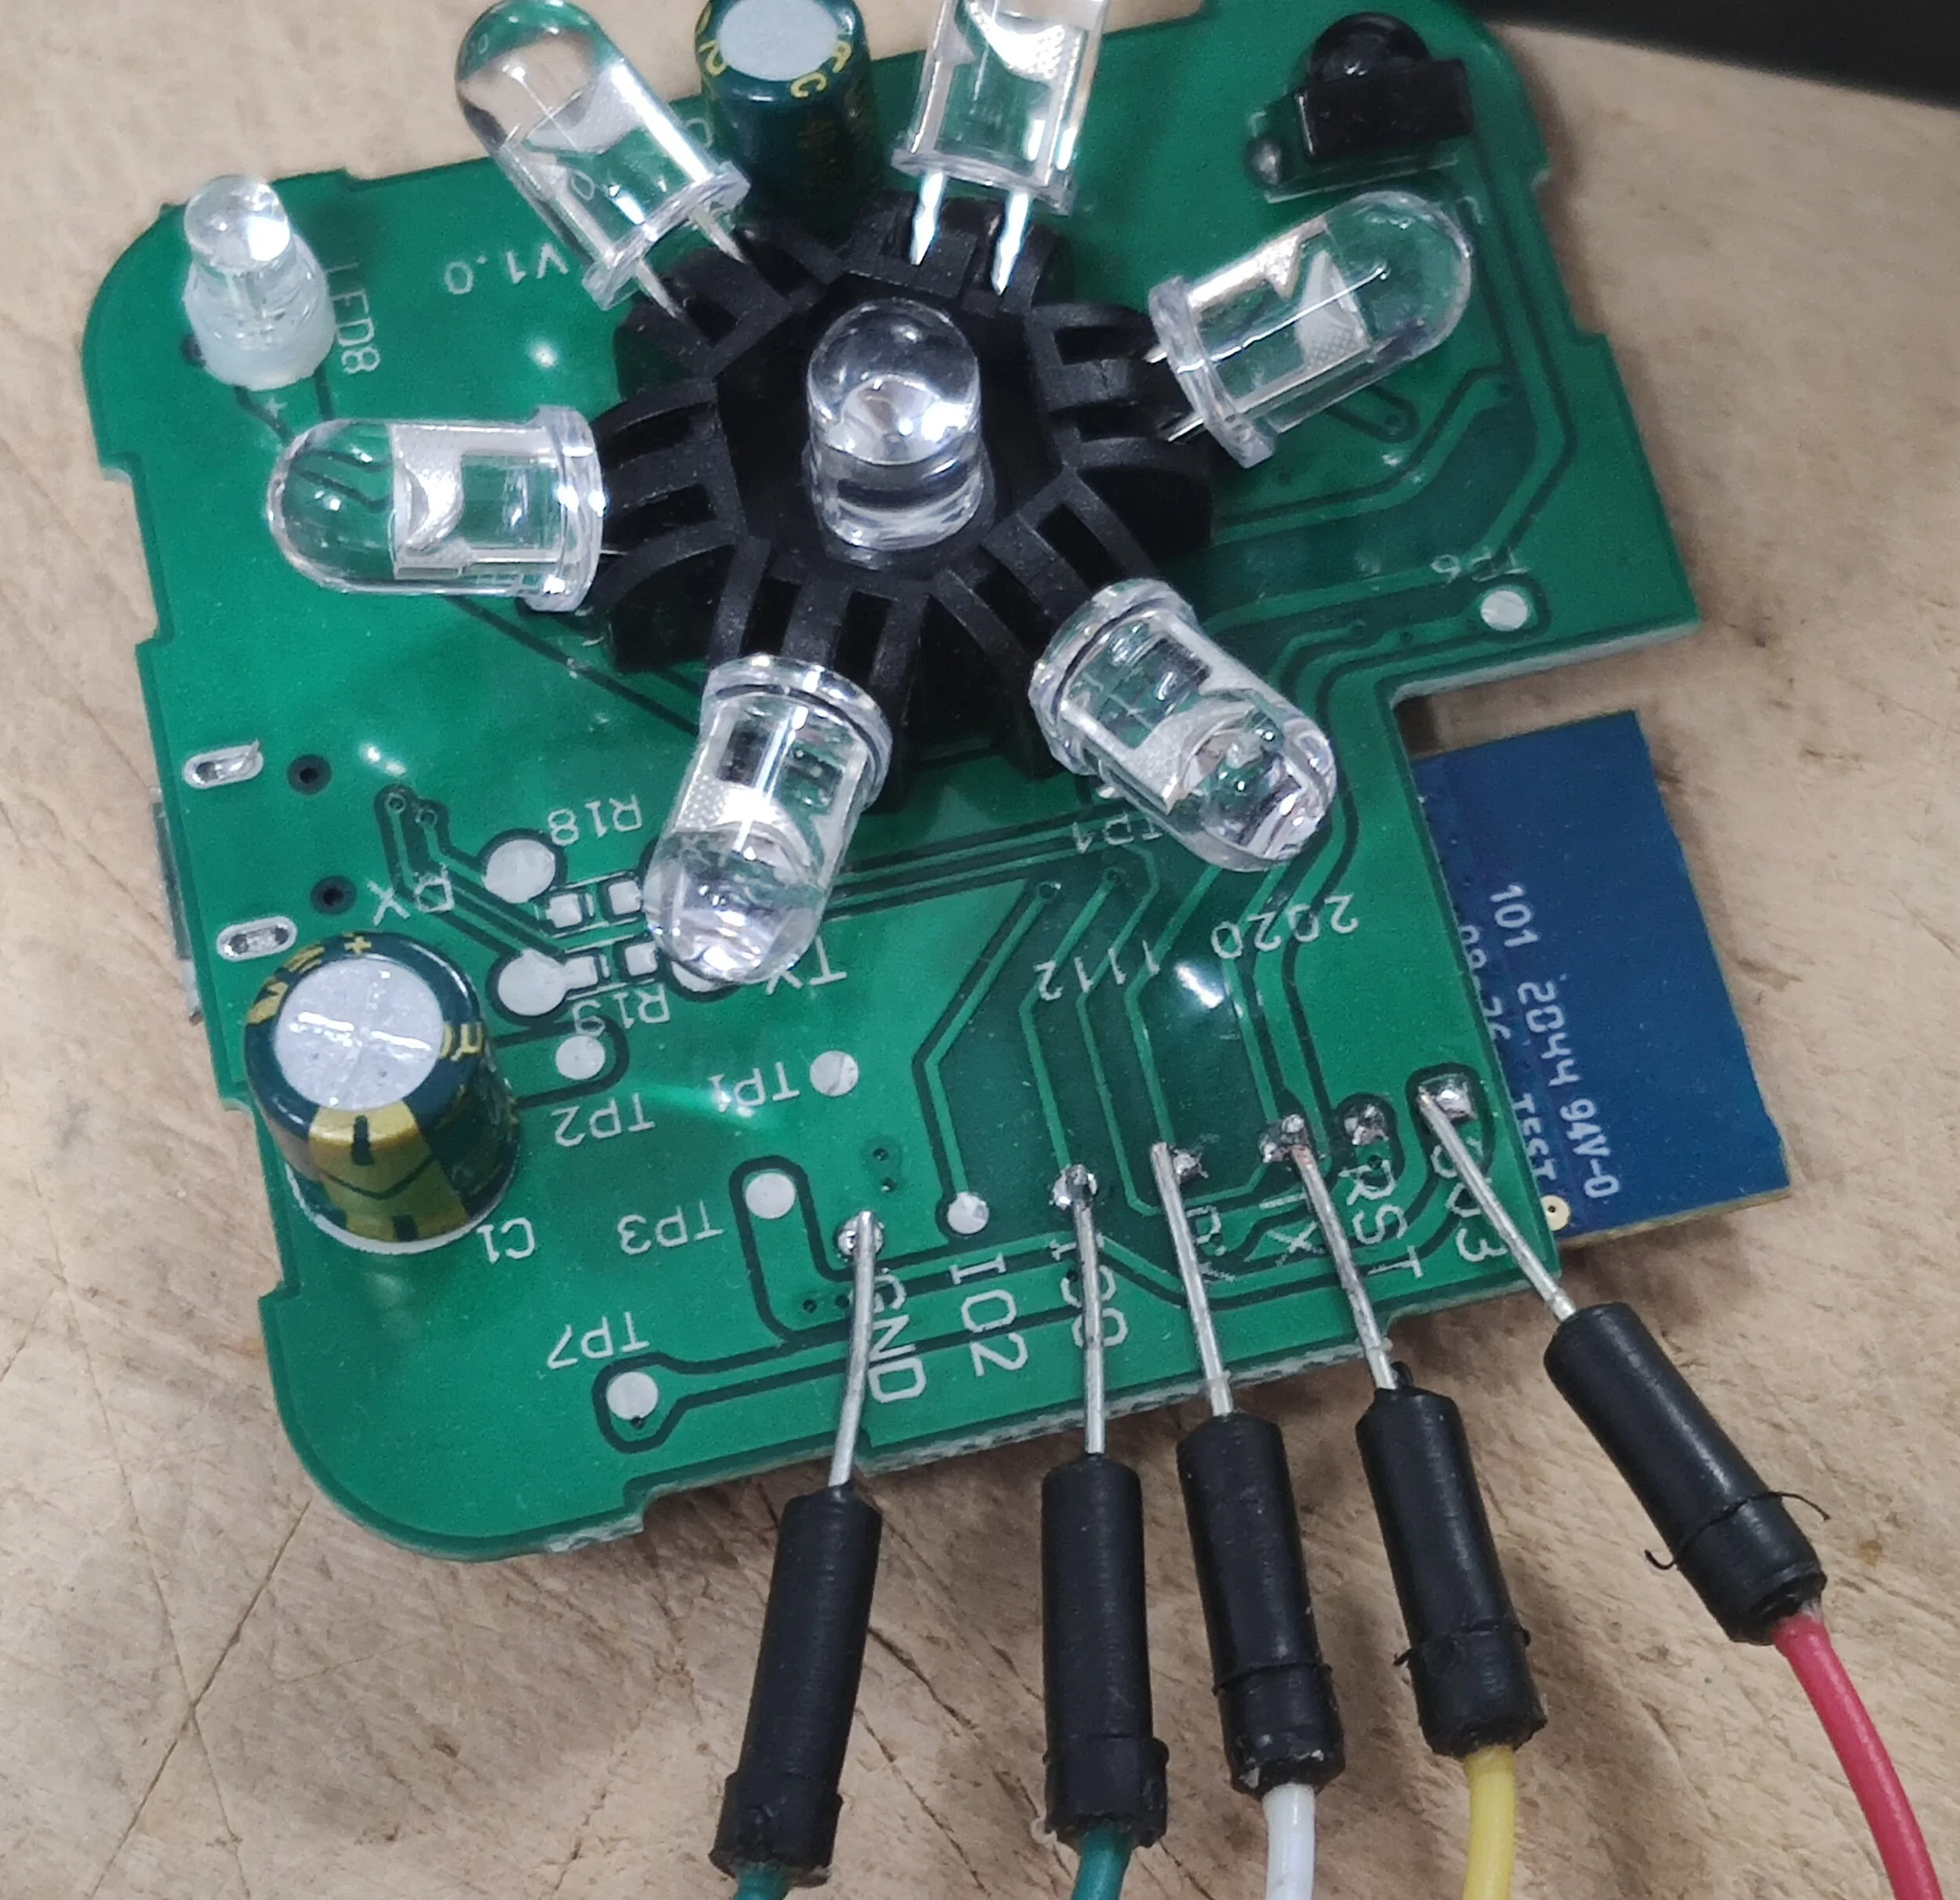
To reprogram an ESP8266 chip, you’ll need to locate 5 pins: The 3.3V power supply input, the RX and TX communications pins, Pin 0 which needs to be grounded to boot the device in to ‘flashing’ mode, and the ground pin. Once these are soldered up with wires, you can connect them to the relevant pins shown below on a RS232 to USB Serial Interface. You might need to install some drivers for this interface if it isn’t fixed up automatically by Windows 10. Once you’ve connected up all the wires, you’re ready to do some flashing! Before you connect the USB cable to the computer, be sure to set the Serial Interface to 3.3 volts rather than 5V as 5V will melt the ESP8266 chip before you can program it!
The diagrammatic version with labelled pins
Step 5 - Flash the firmware
ESPHome built a simple utility which makes this step a bit easier. Download and run the ESPHome flasher at this link. Choose a USB port to connect to (mine was COM6), browse to the .bin file you generated in step 3 and hit the flash button.
When I did this, I was actually astounded to find that it worked without any errors or failures the first time (which is normally the expectation).
Once you see console status messages indicate successful flashing, disconnect the IR Blaster from the Serial Interface and before you desolder cables and connect your regular micro-USB power supply to the USB port directly on the IR blaster circuit board.
Once the board powers up it will try to connect to the WiFi network you gave it login details to.
The result?
When the device powers up, it connects to WiFi and will register itself with ESPHome on your Home Assistant server. I got a pop-up when I next visited my integrations tab, showing that there were discovered devices available to configure. I simply set the ‘area’ (bedroom) for the new device and a ‘climate’ tile was added to my home dashboard.
Once I could tell that it was talking to Home Assistant and that it was also registering commands from my regular AC hand held remote, I was ready to put the plastic case back over the board and put it in it’s final home! Mission accomplishe!


The climate tile for ‘Bedroom AC’ shows the current temperature and the set temperature (23) along with the current AC mode (Cool). It let me click the 3 dot menu on the top right of the tile too to do things like swing the louver.